리소스 핸들러는 HTML, CSS, Javascript, image 등 정적인 자원을 처리해주는 핸들러 이다.
정적 자원을 static resource, 동적 자원을 dynamic resource 라고도 부른다.
이 둘은 HTTP 요청에 따라 응답해주는 자원의 형태가 바뀔 수 있는지에 따라 구분할 수 있다.
웹 애플리케이션을 개발할 때 리소스를 요청하는 쪽을 클라이언트, 제공하는 쪽을 서버라고 한다.
이 때 일반적으로 생각하는 웹 요청을 처리하는 서버는 크게 두가지로 구분할 수 있다.
하나는 웹 서버로 정적인 자원 처리를 전담하고, 다른 하나는 웹 애플리케이션 서버로 동적인 자원 처리를 전담한다.
그럼 정적인 자원과 동적인 자원을 처리하는 서버를 구분하는 이유는 무엇일까.
쉽게 얘기하면 닭잡는 칼로 소를 잡지 않고, 소 잡는 칼로 닭을 잡지 않겠다는 뜻이다.
즉, 정적인 자원을 처리하는데 굳이 동적인 자원을 처리하는 서버가 처리해서 서버 자원을 사용중이라면, 동적인 자원을 처리해야할 때 정적인 자원을 처리중이라는 이유로 해야할 일을 하지 못할 수도 있기 때문이다.
(보안상의 이유도 있지만) 그렇기 때문에 이 둘을 논리적 또는 물리적으로 구분하여 구성하는것이 일반적이다.
최초 서버가 클라이언트로부터 리소스 요청을 받으면 웹 서버가 처리할 수 있는 정적인 자원에 대한 요청인지 확인한다.
맞을 경우 웹 서버는 굳이 웹 애플리케이션 서버에 이 요청을 보내지 않고 클라이언트에 리소스를 전달 한다.
그런데 만약 웹 서버가 처리할 수 없는 리소스 요청을 받으면 웹 서버는 웹 애플리케이션 서버에 이 요청을 전달해서 응답으로 전달 할 리소스를 동적으로 생성하도록 한다.
지금 생각나는 동적 자원으로 쇼핑몰에 등록 된 상품의 재고 수량이 몇개인지 확인하는걸 예로 들 수 있을것 같다.
상품의 재고 수량은 쇼핑몰의 상황에 따라 더 많아질 수도 있고, 판매를 많이 하면 줄어들 수도 있다.
즉, 같은 요청이라고 해도 매번 그 결과가 달라질 수 있고 또 이런 요청에 대한 처리는 웹 애플리케이션 서버에서 Servlet 이 데이터를 가공하여 클라이언트에 반환 해주어야 한다.
얘기가 조금 다른 길로 새어나갔는데, 다시 본론으로 돌아와서 리소스 핸들러는 정적인 자원을 처리해주는 핸들러이다.
모든 Servlet Container 에는 default Servlet 이라는게 등록되어 있다.
실제로 tomcat 을 설치한 다음 conf 디렉토리 하위의 web.xml 을 열어보면 다음과 같이 default Servlet 이 등록되어 있는것을 확인할 수 있다.
<!-- 생략... -->

    <servlet>
        <servlet-name>default</servlet-name>
        <servlet-class>org.apache.catalina.servlets.DefaultServlet</servlet-class>
        <init-param>
            <param-name>debug</param-name>
            <param-value>0</param-value>
        </init-param>
        <init-param>
            <param-name>listings</param-name>
            <param-value>false</param-value>
        </init-param>
        <load-on-startup>1</load-on-startup>
    </servlet>

<!-- 생략... -->

    <servlet>
        <servlet-name>jsp</servlet-name>
        <servlet-class>org.apache.jasper.servlet.JspServlet</servlet-class>
        <init-param>
            <param-name>fork</param-name>
            <param-value>false</param-value>
        </init-param>
        <init-param>
            <param-name>xpoweredBy</param-name>
            <param-value>false</param-value>
        </init-param>
        <load-on-startup>3</load-on-startup>
    </servlet>

<!-- 생략... -->

    <!-- The mapping for the default servlet -->
    <servlet-mapping>
        <servlet-name>default</servlet-name>
        <url-pattern>/</url-pattern>
    </servlet-mapping>

    <!-- The mappings for the JSP servlet -->
    <servlet-mapping>
        <servlet-name>jsp</servlet-name>
        <url-pattern>*.jsp</url-pattern>
        <url-pattern>*.jspx</url-pattern>
    </servlet-mapping>

<!-- 생략... -->
이 Servlet 에 대한 class 파일이 있어서 무슨 내용인지 열어보기로 했다.
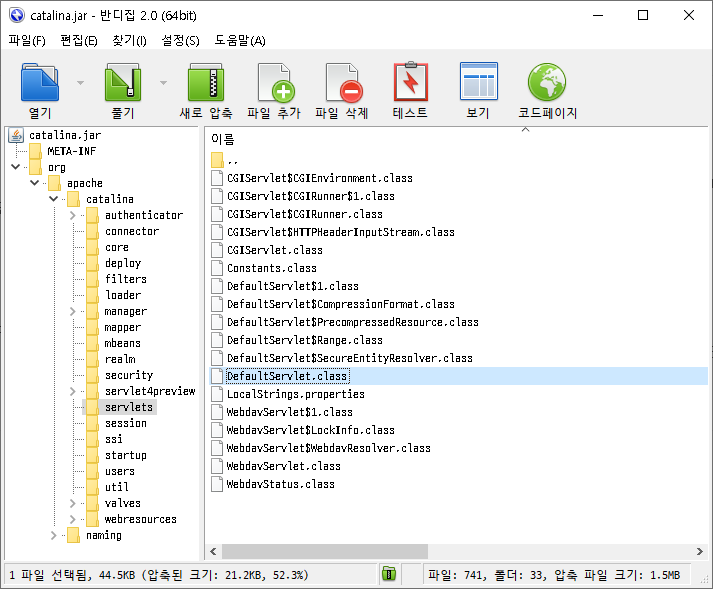
내용이 길어서 일부 눈에 들어온 부분만 가져와 봤다.
// 생략...

public class DefaultServlet extends HttpServlet {

    // 생략...

    public void init() throws ServletException {
        if (this.getServletConfig().getInitParameter("debug") != null) {
            this.debug = Integer.parseInt(this.getServletConfig().getInitParameter("debug"));
        }

        if (this.getServletConfig().getInitParameter("input") != null) {
            this.input = Integer.parseInt(this.getServletConfig().getInitParameter("input"));
        }

        if (this.getServletConfig().getInitParameter("output") != null) {
            this.output = Integer.parseInt(this.getServletConfig().getInitParameter("output"));
        }

        this.listings = Boolean.parseBoolean(this.getServletConfig().getInitParameter("listings"));
        if (this.getServletConfig().getInitParameter("readonly") != null) {
            this.readOnly = Boolean.parseBoolean(this.getServletConfig().getInitParameter("readonly"));
        }

        this.compressionFormats = this.parseCompressionFormats(this.getServletConfig().getInitParameter("precompressed"), this.getServletConfig().getInitParameter("gzip"));
        if (this.getServletConfig().getInitParameter("sendfileSize") != null) {
            this.sendfileSize = Integer.parseInt(this.getServletConfig().getInitParameter("sendfileSize")) * 1024;
        }

        this.fileEncoding = this.getServletConfig().getInitParameter("fileEncoding");
        this.globalXsltFile = this.getServletConfig().getInitParameter("globalXsltFile");
        this.contextXsltFile = this.getServletConfig().getInitParameter("contextXsltFile");
        this.localXsltFile = this.getServletConfig().getInitParameter("localXsltFile");
        this.readmeFile = this.getServletConfig().getInitParameter("readmeFile");
        if (this.getServletConfig().getInitParameter("useAcceptRanges") != null) {
            this.useAcceptRanges = Boolean.parseBoolean(this.getServletConfig().getInitParameter("useAcceptRanges"));
        }

        if (this.input < 256) {
            this.input = 256;
        }

        if (this.output < 256) {
            this.output = 256;
        }

        if (this.debug > 0) {
            this.log("DefaultServlet.init:  input buffer size=" + this.input + ", output buffer size=" + this.output);
        }

        this.resources = (WebResourceRoot)this.getServletContext().getAttribute("org.apache.catalina.resources");
        if (this.resources == null) {
            throw new UnavailableException("No resources");
        } else {
            if (this.getServletConfig().getInitParameter("showServerInfo") != null) {
                this.showServerInfo = Boolean.parseBoolean(this.getServletConfig().getInitParameter("showServerInfo"));
            }

        }
    }

    // 생략...

    protected void service(HttpServletRequest req, HttpServletResponse resp) throws ServletException, IOException {
        if (req.getDispatcherType() == DispatcherType.ERROR) {
            this.doGet(req, resp);
        } else {
            super.service(req, resp);
        }
    }

    // 생략...

    protected void doGet(HttpServletRequest request, HttpServletResponse response) throws IOException, ServletException {
        this.serveResource(request, response, true, this.fileEncoding);
    }

    // 생략...

    protected void doPost(HttpServletRequest request, HttpServletResponse response) throws IOException, ServletException {
        this.doGet(request, response);
    }

    // 생략...

}
실제로 처리하는 부분은 this.serveResource 인데 너무 길어서 첨부하지는 않았다.
관심있으면 꼭 한번 열어봤으면 좋겠다.
Tomcat Servlet Container 의 default Servlet 에 대한 공식 문서를 첨부하니 이 내용 을 참고해도 좋을것 같다.
Spring 은 이렇게 등록 되어 있는 default Servlet 에 요청 처리를 위임해서 정적인 자원을 처리한다.
그리고 Spring Boot 를 사용할 경우 아무 설정을 하지 않아도 기본 설정으로 정적인 자원에 대한 처리가 되어 있다.
이 부분에 대해서 Spring Boot 의 WebMvcAutoConfiguration 클래스 파일에 등록하는 부분이 정의되어 있다.
    @Override
    public void addResourceHandlers(ResourceHandlerRegistry registry) {
        if (!this.resourceProperties.isAddMappings()) {
            logger.debug("Default resource handling disabled");
            return;
        }
        Duration cachePeriod = this.resourceProperties.getCache().getPeriod();
        CacheControl cacheControl = this.resourceProperties.getCache()
                .getCachecontrol().toHttpCacheControl();
        if (!registry.hasMappingForPattern("/webjars/**")) {
            customizeResourceHandlerRegistration(registry
                    .addResourceHandler("/webjars/**")
                    .addResourceLocations("classpath:/META-INF/resources/webjars/")
                    .setCachePeriod(getSeconds(cachePeriod))
                    .setCacheControl(cacheControl));
        }
        String staticPathPattern = this.mvcProperties.getStaticPathPattern();
        if (!registry.hasMappingForPattern(staticPathPattern)) {
            customizeResourceHandlerRegistration(
                    registry.addResourceHandler(staticPathPattern)
                            .addResourceLocations(getResourceLocations(
                                    this.resourceProperties.getStaticLocations()))
                            .setCachePeriod(getSeconds(cachePeriod))
                            .setCacheControl(cacheControl));
        }
    }
22번째 라인의 this.resourceProperties.getStaticLocations() 를 따라가보면
// 생략...

@ConfigurationProperties(prefix = "spring.resources", ignoreUnknownFields = false)
public class ResourceProperties {

    private static final String[] CLASSPATH_RESOURCE_LOCATIONS = {
            "classpath:/META-INF/resources/", "classpath:/resources/",
            "classpath:/static/", "classpath:/public/" };

    /**
     * Locations of static resources. Defaults to classpath:[/META-INF/resources/,
     * /resources/, /static/, /public/].
     */
    private String[] staticLocations = CLASSPATH_RESOURCE_LOCATIONS;

    /**
     * Whether to enable default resource handling.
     */
    private boolean addMappings = true;

    private final Chain chain = new Chain();

    private final Cache cache = new Cache();

    public String[] getStaticLocations() {
        return this.staticLocations;
    }

// 생략...

}
String[] 타입의 this.staticLocations 를 반환하는 getStaticLocations() 가 정의되어 있고, 이 변수는 final 변수 CLASSPATH_RESOURCE_LOCATIONS 에 정의된 기본 경로가 자동으로 등록 된다.
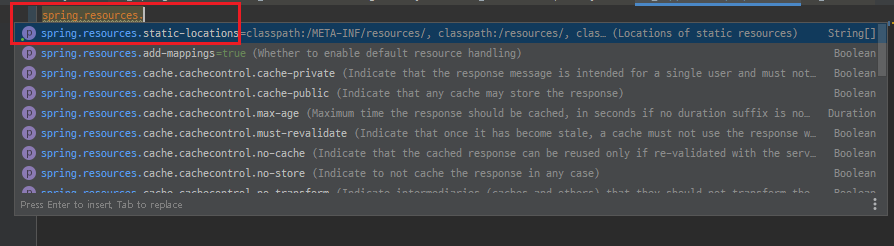
그리고 이 내용으로 한가지 더 알 수 있는 점은, application.properties 파일을 통해 spring.resources 를 사용해서 수정이 가능하다는 것이다.
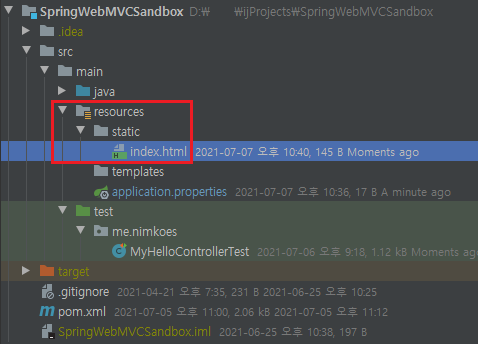
실제로 매핑되는 Servlet 이 없을 경우 default Servlet 에 의해 static resource 를 사용할 수 있는지 확인해보자.
Spring Boot 를 사용하고 있고, 기본적으로 classpath:/static 을 사용하고 있기 때문에 이 위치에 html 파일을 하나 만들고 요청 결과를 확인해보자.
<!DOCTYPE html>
<html lang="en">
<head>
    <meta charset="UTF-8">
    <title>Title</title>
</head>
<body>
<h1>Hello Nimkoes</h1>
</body>
</html>
테스트 해보기 위해 기존에 만들어 둔 MyHelloControllerTest 에 테스트 케이스를 하나 더 추가했다.
package me.nimkoes;

import static org.springframework.test.web.servlet.request.MockMvcRequestBuilders.get;
import static org.springframework.test.web.servlet.result.MockMvcResultHandlers.print;
import static org.springframework.test.web.servlet.result.MockMvcResultMatchers.content;
import static org.springframework.test.web.servlet.result.MockMvcResultMatchers.status;
import org.hamcrest.Matchers;
import org.junit.Test;
import org.junit.runner.RunWith;
import org.springframework.beans.factory.annotation.Autowired;
import org.springframework.boot.test.autoconfigure.web.servlet.AutoConfigureMockMvc;
import org.springframework.boot.test.context.SpringBootTest;
import org.springframework.test.context.junit4.SpringRunner;
import org.springframework.test.web.servlet.MockMvc;

@RunWith(SpringRunner.class)
@SpringBootTest
@AutoConfigureMockMvc
public class MyHelloControllerTest {

    // @WebMvcTest annotation 을 정의하면 MockMvc 를 주입받을 수 있다.
    @Autowired
    MockMvc mockMvc;

    @Test
    public void hello() throws Exception {
        this.mockMvc.perform(get("/hello")
                .param("name", "nimkoes"))
            .andDo(print())
            .andExpect(content().string("hello nimkoes"));
    }

    @Test
    public void staticTest() throws Exception {
        this.mockMvc.perform(get("/index.html"))
            .andDo(print())
            .andExpect(status().isOk())
            .andExpect(content().string(Matchers.containsString("Hello Nimkoes")));
    }

}
아래쪽에 추가한 staticTest 테스트를 실행해보면 테스트가 성공한다.
| MockHttpServletRequest: HTTP Method = GET Request URI = /index.html Parameters = {} Headers = {} Body = null Session Attrs = {} Handler: Type = org.springframework.web.servlet.resource.ResourceHttpRequestHandler Async: Async started = false Async result = null Resolved Exception: Type = null ModelAndView: View name = null View = null Model = null FlashMap: Attributes = null MockHttpServletResponse: Status = 200 Error message = null Headers = {Last-Modified=[Wed, 07 Jul 2021 13:40:37 GMT], Content-Length=[145], Content-Type=[text/html], Accept-Ranges=[bytes]} Content type = text/html Body = <!DOCTYPE html> <html lang="en"> <head> <meta charset="UTF-8"> <title>Title</title> </head> <body> <h1>Hello Nimkoes</h1> </body> </html> Forwarded URL = null Redirected URL = null Cookies = [] |
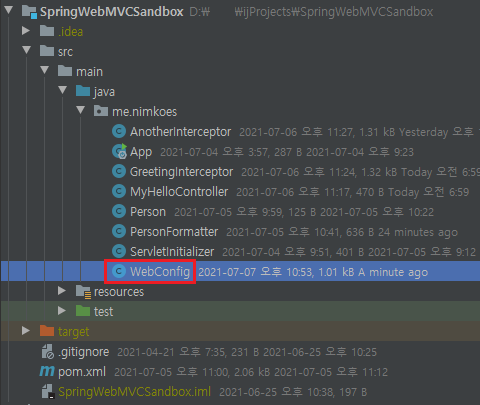
마지막으로 직접 리소스 핸들러를 등록하는 방법을 정리해 본다.
이것 역시 WebMvcConfigurer 인터페이스를 오버라이딩 해서 핸들러를 추가할 수 있다.
package me.nimkoes;

import java.util.concurrent.TimeUnit;
import org.springframework.context.annotation.Configuration;
import org.springframework.http.CacheControl;
import org.springframework.web.servlet.config.annotation.InterceptorRegistry;
import org.springframework.web.servlet.config.annotation.ResourceHandlerRegistry;
import org.springframework.web.servlet.config.annotation.WebMvcConfigurer;

@Configuration
public class WebConfig implements WebMvcConfigurer {

    @Override
    public void addInterceptors(InterceptorRegistry registry) {
        registry.addInterceptor(new GreetingInterceptor())
            .addPathPatterns("/hi")
            .order(0);
        registry.addInterceptor(new AnotherInterceptor()).order(-1);
    }

    @Override
    public void addResourceHandlers(ResourceHandlerRegistry registry) {
        registry.addResourceHandler("/m/**")            // 어떤 패턴의 요청을 처리할지 정의
            .addResourceLocations("classpath:/m/")      // 리소스를 찾을 위치
            .setCacheControl(CacheControl.maxAge(10, TimeUnit.MINUTES));    // 리소스가 변경되지 않은 동안 캐싱을 유지할 시간
    }
}
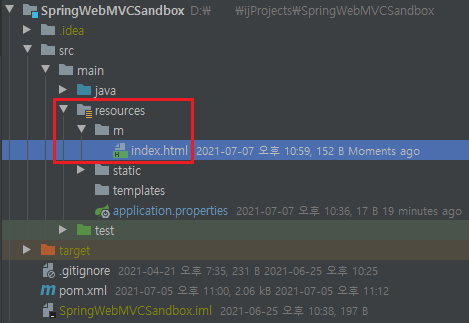
classpath 중 resource 경로에 m 폴더를 만들고 테스트를 해보자.
<!DOCTYPE html>
<html lang="en">
<head>
    <meta charset="UTF-8">
    <title>Title</title>
</head>
<body>
<h1>Hello Mobile Nimkoes</h1>
</body>
</html>
그리고 다음과 같이 테스트 코드를 추가하여 테스트를 실행해 보았다.
    @Test
    public void staticTest_M() throws Exception {
        this.mockMvc.perform(get("/m/index.html"))
            .andDo(print())
            .andExpect(status().isOk())
            .andExpect(content().string(Matchers.containsString("Hello Mobile Nimkoes")))
            .andExpect(header().exists(HttpHeaders.CACHE_CONTROL));
    }
| MockHttpServletRequest: HTTP Method = GET Request URI = /m/index.html Parameters = {} Headers = {} Body = null Session Attrs = {} Handler: Type = org.springframework.web.servlet.resource.ResourceHttpRequestHandler Async: Async started = false Async result = null Resolved Exception: Type = null ModelAndView: View name = null View = null Model = null FlashMap: Attributes = null MockHttpServletResponse: Status = 200 Error message = null Headers = {Last-Modified=[Wed, 07 Jul 2021 13:59:20 GMT], Cache-Control=[max-age=600], Content-Length=[152], Content-Type=[text/html], Accept-Ranges=[bytes]} Content type = text/html Body = <!DOCTYPE html> <html lang="en"> <head> <meta charset="UTF-8"> <title>Title</title> </head> <body> <h1>Hello Mobile Nimkoes</h1> </body> </html> Forwarded URL = null Redirected URL = null Cookies = [] |
테스트 내용이 의도한 대로 동작 하였으며, 아까와 달리 Header 에 추가 등록한 Cache-Control 에 대한 max-age 값도 600초 (10분) 으로 정상적으로 설정된 것을 볼 수 있었다.
추가로 addResourceHandler 로 리소스 핸들러를 등록할 때, 리소스를 찾는 경로로 classpath 뿐만 아니라 file system 을 줄 수도 있다.
그리고 classpath 또는 file 과 같은 값을 주지 않고 그냥 경로만 입력할 경우 src/main/webapp 경로를 사용 한다.
    @Override
    public void addResourceHandlers(ResourceHandlerRegistry registry) {
        registry.addResourceHandler("/m/**")            // 어떤 패턴의 요청을 처리할지 정의
            .addResourceLocations("classpath:/m/", "file:/Users/nimkoes/files/", "/myStatic/")  // 리소스를 찾을 위치
            .setCacheControl(CacheControl.maxAge(10, TimeUnit.MINUTES));  // 리소스가 변경되지 않은 동안 캐싱을 유지할 시간
    }
위와 같이 작성한 경우 src/main/webapp/myStatic/ 에서도 /m/** 패턴의 요청에 대해 리소스를 찾는 경로로 사용할 수 있다.
'Archive > Spring Web MVC' 카테고리의 다른 글
| 3.1 요청 매핑하기 (handler method) (1) | 2021.07.11 |
|---|---|
| 2.6 HTTP 메시지 컨버터 (JSON, XML) (0) | 2021.07.09 |
| 2.4 핸들러 인터셉터 (HandlerInterceptor interface) (0) | 2021.07.07 |
| 2.3 Spring Web MVC 의 Formatter (Spring Boot 자동 설정) (0) | 2021.07.06 |
| 2.2 Spring Boot 의 Spring MVC 설정 (war 배포) (0) | 2021.07.05 |